
ODriveFirmware
This project is all about accuratly driving brushless motors, for cheap. The aim is to make it possible to use inexpensive brushless motors in high performance robotics projects.
Like this (click for video):
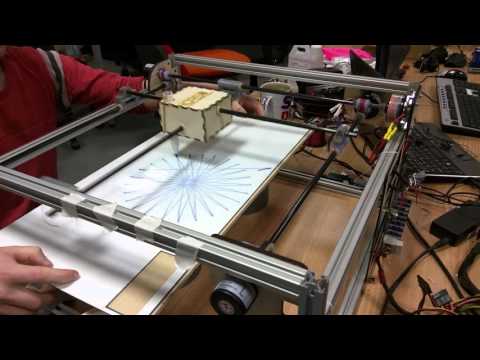
This repository contains the firmware that runs on the board. The other related repositories are:
- ODriveHardware: Circuit board design. Also, the pinout from the microcontroller to the board is documented here.
- ODrive: Configuration and analysis scripts that runs on a PC.
There is also ODriveFPGA, which contains the FPGA logic and software that runs on the FPGA based ODrive. This is not currently in development, but may be resumed at some later date.
Table of contents
- Compiling and downloading firmware
- Generating startup code
- Setting up Eclipse development environment
Compiling and downloading firmware
Getting a programmer
Get a programmer that supports SWD (Serial Wire Debugging) and is ST-link v2 compatible. You can get them really cheap on eBay or many other places.
Installing prerequisites
To compile the program, you first need to install the prerequisite tools:
Linux:
gcc-arm-none-eabi: GCC compilation toolchain for ARM microcontrollers.- Installing on Ubuntu:
sudo apt-get install gcc-arm-none-eabi
- Installing on Ubuntu:
gdb-arm-none-eabi: GNU project debugger for ARM microcontrollers.- Installing on Ubuntu:
sudo apt-get install gdb-arm-none-eabi
- Installing on Ubuntu:
OpenOCD: Open On-Chip Debugging tools. This is what we use to flash the code onto the microcontroller.- Installing on Ubuntu:
sudo apt-get install openocd
- Installing on Ubuntu:
Windows:
Git Bash and manual tool installations
Install the following:
- Git for windows. This intalls the Git Bash, which is a unix style command line interface that we will be using.
- GNU ARM Embedded Toolchain. The cross-compiler used to compile the code. Download and install the "Windows 32-bit" version. Add the path of the binaries to your PATH environment variable. For me this was at
C:\Program Files\GNU ARM Eclipse\OpenOCD\0.10.0-201704182147-dev\bin. - Make for Windows. Make is used to script the compilation process. Download and run the complete package setup program. Add the path of the binaries to your PATH environment variable. For me this was at
C:\Program Files (x86)\GnuWin32\bin. - OpenOCD. Follow the instructions at GNU ARM Eclipse - How to install the OpenOCD binaries, including the part about ST-LINK/V2 drivers.
After installing all of the above, open a Git Bash shell. Continue at section Building the firmware.
Cygwin
TODO
Building the firmware
- Make sure you have cloned the repository.
- Navigate your terminal (bash/cygwin) to the ODriveFirmware dir.
- Run
makein the root of this repository.
Flashing the firmware
Connect SWD, SWC, and GND on connector J2 to the programmer.
You need to power the board by only ONE of the following: VCC(3.3v), 5V, or the main power connection (the DC bus). The USB port (J1) does not power the board.
Run make flash in the root of this repository.
Debugging the firmware
Run make gdb. This will reset and halt at program start. Now you can set breakpoints and run the program. If you know how to use gdb, you are good to go.
If you prefer to debug from eclipse, see Setting up Eclipse development environment.
Generating startup code
Note: You do not need to run this step to program the board. This is only required if you wish to update the auto generated code.
This project uses the STM32CubeMX tool to generate startup code and to ease the configuration of the peripherals. We also use a tool to generate the Makefile. The steps to do this are as follows.
Installing prerequisites
stm32cubeMX: Tool from STM to automatically generate setup routines and configure libraries, etc.- Available here
Generate code
- Run stm32cubeMX and load the
stm32cubemx/Odrive.iocproject file. - Press
Project -> Generate code - You may need to let it download some drivers and such.
Generate makefile
There is an excellent project called CubeMX2Makefile, originally from baoshi. This project is included as a submodule.
- Initialise and clone the submodules:
git submodule init; git submodule update - Generate makefile:
python2 CubeMX2Makefile/CubeMX2Makefile.py .
Setting up Eclipse development environment
Install
- Install Eclipse IDE for C/C++ Developers
- Install the OpenOCD Eclipse plugin
Import project
- File -> Import -> C/C++ -> Existing Code as Makefile Project
- Browse for existing code location, find the OdriveFirmware root.
- In the Toolchain options, select
Cross GCC - Hit Finish
- Build the project (press ctrl-B)

Load the launch configuration
- File -> Import -> Run/Debug -> Launch Configurations -> Next
- Highlight (don't tick) the OdriveFirmare folder in the left column
- Tick OdriveFirmware.launch in the right column
- Hit Finish

Launch!
- Make sure the programmer is connected to the board as per Flashing the firmware.
- Press the down-arrow of the debug symbol in the toolbar, and hit Debug Configurations
- You can also hit Run -> Debug Configurations
- Highlight the debug configuration you imported, called OdriveFirmware. If you do not see the imported launch configuration rename your project to
ODriveFirmwareor edit the launch configuration to match your project name by unfiltering unavailable projects:

- Hit Debug
- Eclipse should flash the board for you and the program should start halted on the first instruction in
Main - Set beakpoints, step, hit Resume, etc.
- Make some cool features! ;D